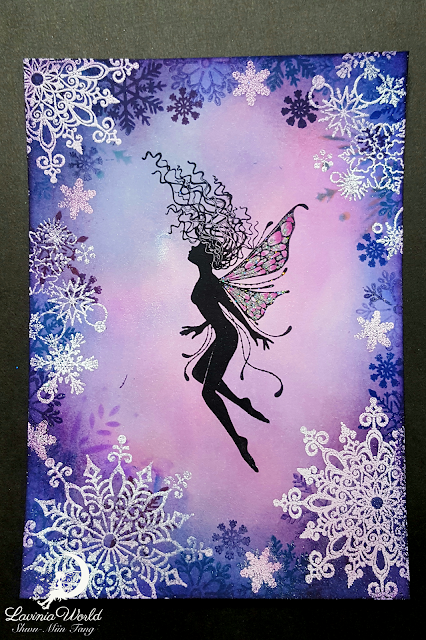
 Celeste in the Midst of Snow FlurriesI created this background using Tracey's gel press system. This will be my first attempt at a photo tutorial. Quite frankly, Tracey's Youtube tutorials on this technique are excellent. I try to copy her as much as I can, with maybe one or two small twists.
First of all, I do not own any brushos, but I find that Ken Oliver's colorburst crystals work just as well. Here are some of the colors I have: Lemon Yellow, Yellow Ochre, Burnt Orange, Crimson Red, Merlot, Sepia, Lime Green, Spring Green, Teal, Terre Verte, Blue, Violet, Orchid, and Indigo.
After mixing a small amount (less than the size of a green pea) of these crystals and lots of water, I'm ready to begin:
You can use any smooth cardstock, but I find multifarious cards to be the best for these backgrounds. X-Press it blending cards come close. It has a better price point but is not as thick. For this example I used the multifarious card.
I selected Wilted Violet distress oxide as my base layer and brayered it onto a 5 x 7 gel press:
 |
Finally I sprinkled some Indigo around all the edges.
Now it's time to place the multifarious card on top of the gel press and see what kind of print we get. A word of caution: do not wait too long to pull the paper from the gel press, you won't get any movement because it'll be too dried. I counted to 5 while smoothing over the cardstock over the gel press and pulled it right after counting to 5. And you can pull from top to bottome, left to right, or one corner to the opposite corner. Experiment!!
And this is what I got.


Lovely card.
ReplyDeleteFabulous step by step tutorial! Even I think I could do it after seeing how you did it. I'm amazed that those small splatters of paint covered the paper so well.
ReplyDeleteGorgeous!! I think I missed how you colored up her wings.
ReplyDeleteAbsolutely stunning! Thanks so much for your tutorial! Beautiful background to showcase this beautiful cool scene. Hugs ~ Lena
ReplyDelete